Wedding Photography Tips Black and White
Black and White Photography Explained
When shooting digital, you should NEVER do B&W in the camera. You lose valuable information that your computer can use to make many different B&W images from one color image.
It's always better to shoot in color
Black and white doesn't retain any color information, while color can easily go to different types of black and white. This means that you want color negatives from your photographer, if possible. Of course, you should never pressure them to do something outside of their artistic comfort zone. This is to just let you know the flexibility you will have after you get your originals.
Black and white does not go to color, but color makes many variations of black and white
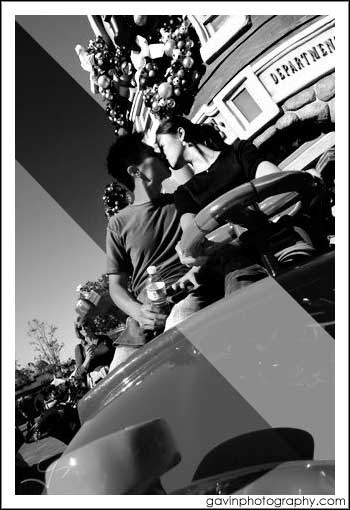
Here is a great example of the difference in black and white styles. Here's a picture I took of a couple at Disneyland during an engagement shoot. I chose the image for its saturated reds and blues to prove a point. It is followed by three variations of black and white put into one image.

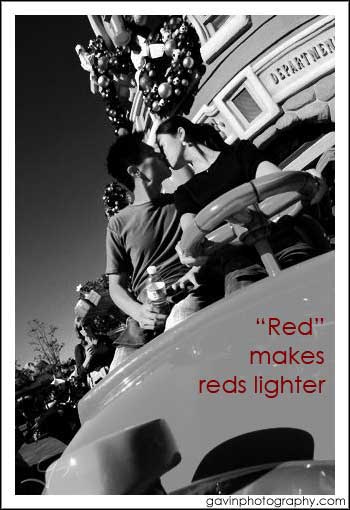
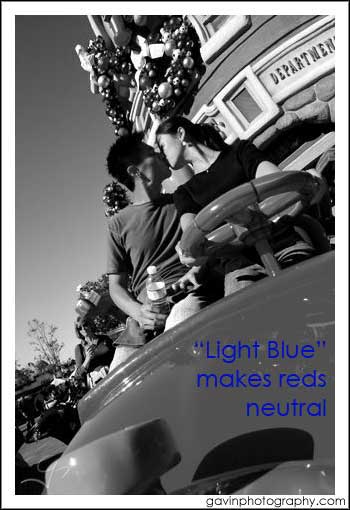
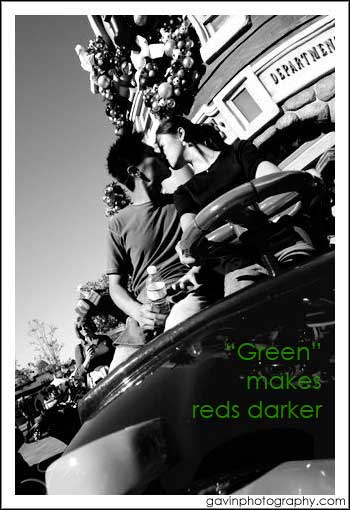
Now here are the separate spectrums labeled according to the color that the black and white is pulled from. Also I've included the histograms in Photoshop so you can see how they differ between each type of color versus all colors (the top histogram).
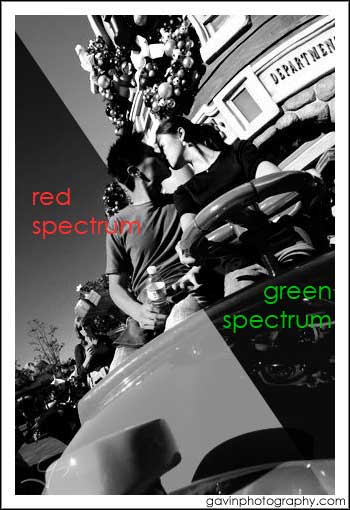
Getting technical with Histograms (for the geeks like me)
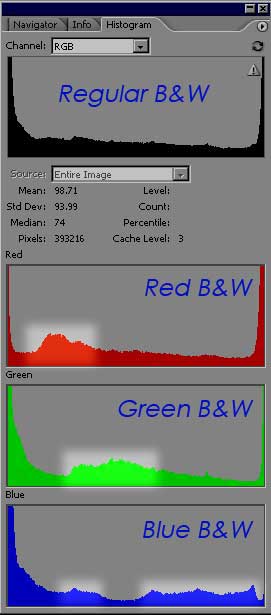
Seeing the differences between colors
You can see to the left I've provided the histograms of the different colors from Photoshop. You can see that the first histogram marked as regular B&W is a combination of all three colors, but does not tell you what colors are piled up where. As you can see from the second histogram, I have a bunch of red piled up at the lighter side of the spectrum, while the blues and greens lean toward the darker side. This means that the highlights use the red colors more often, while blues and greens define the shadows.
You can also see clumps of red and green that do not line up (as seen in the highlights). When these do not line up, it means that one color dominates one area (either highlights, midtones, or shadows). This is all important when switching the image to black and white. Skin tones are predominately reds and oranges, which means that by choosing either red or green you can make the reds lighter or darker. This affects contrast and gradations, which directly affects wrinkles in skin and blemishes.
You can play with these settings yourself by adjusting the Hue and Saturation and from there lightening or darkening the specific colors. You can also view the Channels tab to see where each color is concentrated. Remember that the color information is a way to segment the image into different sections based on the colors. If you lose this information, the modifications you can make to the black and white image is limited.
What this means to you...
If you plan on doing your own post-production, try to get images in color for the most flexibility. Otherwise, you should let the photographer choose what is best for their work flow and you get your final product in the best way they can deliver it.
If you found this article useful, spread the love!
Please post this on websites, bulletin boards, myspace profiles, or if you are another photographer that wants to help his brides. I want the advice to spread and help brides make better decisions.
Click to highlight, copy (Ctrl-C), and paste (Ctrl-V) into a webpage or posting.
Or this:
<a href="https://www.gavinphotography.com/article-black-and-white-photography.html"> Wedding Photography Tips - Black and white photography explained </a>
Thanks a bunch! Oh yeah, go ahead and give me feedback on unanswered questions or if this article needs help.
